 If
you have ever attempted to document a recording session, you
know how difficult it is to keep track of things using simple
track sheets. If your control room looks like mine, then you
have many yellow sticky notes hanging around and several versions
of track sheets that made complete sense yesterday, but are
nothing but gibberish today. Did you ever want to reproduce
a signal path or a guitar sound that you recorded several
months ago just to find that the exact technique is lost forever
because you didn’t document it?
Ladies
and gentlemen, TrackNotes has come to the rescue! TrackNotes
is a Track Management System used to document recording
sessions and other pertinent studio information. The software
has extensive reporting capabilities, including several different
versions of track sheets. With TrackNotes, you can document
as much or as little as you want. The software molds itself
to your studio and the result is complete and clearly documented
track management. After using TrackNotes, it doesn't take
long to realize that the software conforms itself to your
needs and how you work - and not the other way around.
My
first thought was that every studio is configured differently,
therefore there's no way a single Track Management System
could be generic enough to apply to all the studio platforms
that exist on today's market. It’s a logical thought, but
it’s incorrect. As I began looking around the software, I
found I could indeed configure it to meet each and every one
of my recording session needs. All of them… no kidding!
TrackNotes
is divided into 4 views: Song; Track; Memo; and the Studio.
I’ll take you through each of these views in turn:
Studio
View:
 We’ll start with this View first,
because this is where you will customize the program to fit
your studio. The Studio View stores information about everything
in your studio, from instruments to rack devices to the musicians
you work with. As we will see later on, information entered
in the Studio View is global across all your songs and is
used exclusively in the Track View portion of the program.
The Studio View also allows you to assign monetary values
to all your equipment, providing you with complete studio
asset valuation tracking.
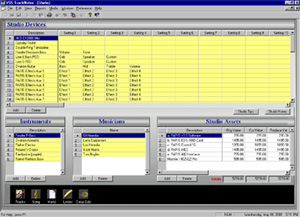
The
Studio View is broken down into 4 grids: Studio Devices; Instruments;
Musicians; and Studio Assets.
The
"Studio Devices Grid" stores all your studio devices (including
instruments) and a list of their setting labels. These devices
and setting listings are accessible in the Track View when
documenting your tracks and Signal Path. For example, you
may want to enter microphones, pre-amps, your reverb unit,
your graphic EQ, and a few guitar pedals as devices. You then
can enter up to 50 setting labels for each device, such as
volume, tone, presence, high, mid and low, etc. It should
also be noted that your devices need be entered only once
to set up your studio in TrackNotes. After that, the devices
are available to all your songs and projects.
The
Studio View's "Instrument Grid" stores all your instruments.
Use this grid to enter guitars, basses, etc. Be specific.
Entering "guitar" and "bass" doesn't help, as we'll see later…
you want to put in "Ovation Acoustic," "White P-Bass," and
"Blue P-Bass".
The
"Musicians Grid" is a database of the names of the musicians
you work with, naturally. This may seem like overkill at first,
but it’s going to save you a lot of typing later.
The
"Studio Assets Grid" helps you appraise your studio equipment.
You enter each item, its original cost, value, and replacement
cost, model, serial number, date of purchase and comments.
The grid calculates and tracks the cost of your total studio
gear and how much it would cost to replace it. This is a really
nice bonus feature of TrackNotes.
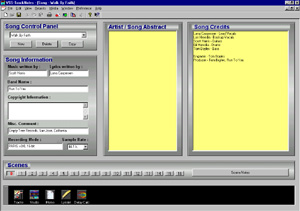
Song
View:
 The Song View's "Song Control Panel"
is where you create, delete, and select songs. The remainder
of this View allows you to enter general Song information,
such as writers, credits, copyright info, comments and even
recording mode. There is an area dedicated to the song description
of the song: how the song was written, what inspired it, etc.
Tracks
View:
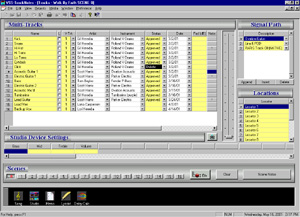
 Tracks View is where session documentation
happens. This View is made up of four grids plus a Scene section.
The grids include the Multi-Tracks, Signal Path Devices, Signal
Path Settings, and Location Points. The Scene area supports
up to 16 Scene snapshots.
Before
delving too deeply into the Tracks View section, I should
mention that there is a preference option that allows you
to configure the software for the number of tracks (and virtual
tracks) you have in your studio. For me… this is a nice set
up option because I have a 16-track system, but I also have
CPU tracks I can use, plus a feature specific to PARIS called
"Intelligent Submixing"… I can configure TrackNotes to give
me a place to document all of those options. This way, I am
able to use TrackNotes as though it was a custom application
written for my studio.
The
"Multi-Tracks Grid" is where individual track information
is entered. The "Name" column describes the track: "Guitar,"
"Bass," "Drums," etc. The "Artist" column is the person performing
the track. Remember the Studio View’s "Musician Grid" that
allowed for musicians’ names to be added? Well, here is where
this feature pays off. With a click of a pull-down menu, all
those names are right there. Select the musician you want
to enter - you don't have to type in all their names! The
same thing holds true for the "Instrument" column, select
the instrument used on this track from that database you set
up earlier in the Studio View. The "Status" column is where
you can select from a pre-programmed "Track Status": "Approved,"
"Delete," "Retake," etc. This feature enables an engineer
to quickly glance at a track's status. The next column represents
the date the track was recorded or updated, etc. Sounds easy
- it is.
There
is also a "Fader" column that is used to document a track’s
fader level. You can use this column to enter values from
-40 dB up to 8 dB. The cool thing about this column is that
it is bound to a sliding fader control that moves north and
south. As you slide the fader control, TrackNotes reflects
the appropriate dB level in the "Fader" column for the selected
track. There is also a "Notes" button column that opens up
a small edit window so you can type in notes specific to each
track.
The
"Signal Path Grid" is amazingly cool. Here you have the option
to add studio devices to the selected track's signal path.
Remember how I described entering all the devices (ex. reverb,
EQ, and other devices) in the Studio View's device grid? Well,
here is the payoff. A drop-down selection appears and any
studio device can be selected from the list. Let's say we
want to add the signal path for an acoustic guitar track.
First we select the acoustic guitar’s track on the Multi-Track
Grid. Next we append a record to the Signal Path Grid, drop
down the list of devices, and select the "Ovation Acoustic"
for that record. This becomes the first item in our signal
path. We then add another device, drop-down the selector control,
and select an effects box - a "Line 6 POD" for example. Drop
that in. Then add whatever device is next in the chain, and
so on. You can see how simple it is to document the signal
path for each track. But that's not all. Remember how we entered
setting labels for each device? When we highlight a Signal
Path device, these same setting labels appear in the "Studio
Device Settings" grid. There you can enter the actual session
settings for each device in the signal path.
Does
your multitrack allow for locator points? TrackNotes has an
area for "Locations" too.
Side
note: Because TrackNotes is a Multiple Document Interface
(MDI) application, you can work on multiple songs concurrently
- meaning that you can easily copy specific archived tracks,
settings, and signal paths, from one song to another. For
example, let's say you have a vocal track that was recorded
several months ago and you want to copy its signal path settings
to another song. Open both songs via the song control panel,
go to the Track View for the original song, right-click the
track you want to copy, and select either "Copy Track," "Copy
Signal Path," or "Copy Track and Signal Path." Then switch
over to the new song, select the target track I want to copy
the data to, press paste, and "voila"! I now have transferred
the old track with all its settings to the current song. You
can also copy a complete scene from one song to another. It
doesn't get easier than this!
An
additional item in the Tracks View is a button with an icon
that looks like a camera. If you don’t have a digital camera
yet, here’s your excuse to get one. Let's say you have a miking
set-up specific to… oh, a French Horn and the technique works
great. Trying to describe this set-up in words can be difficult,
but a picture is worth a thousand words! Take a few photos
of the set up and save the image files in the directory for
that song. Now, click on that little camera button… up pops
a "Viewer" screen. Your photos are now available in the viewer…
double-click one of the thumbnails and a full-sized view of
that photo pops up. This is an awesome feature for TrackNotes.
Because I work in PARIS and it's on a computer, I do screen
dumps of my mixer window, graphic EQ screen, and editor windows,
and then save those as graphics files in the data folder for
that song. The viewer lets me look at these graphics at any
time.
Lastly
in the Tracks View are the Scene controls. These allow you
to take snapshots of your session at various stages. You start
out your session documentation in "Scene 0." Let's say you
have a major change, like, the drums are mixed down to a stereo
pair of tracks… copy "Scene 0" to "Scene 1" by clicking the
"Scene 1" button, then you can document the mix-down. If you
forget when, how, or why the drums were mixed down to a stereo
pair… you can go back to "Scene 0" and compare it to "Scene
1," or just check your "Scene Notes" to read your summary
of when, how, and why the drums were mixed down.
The
navigation at the bottom of the screen is very well designed.
This is how you move from one View to another. There is also
a Memo button that lets you document any general notes about
your session. There is another button that opens a delay calculator
plug-in applet called Delay-It. Select or enter a tempo and
Delay-It will provide you the quarter note, eighth note, sixteenth-note
and triplet delay in milliseconds. The Lyricist button opens
up TrackNotes’ sister application (Lyricist, sold separately,
can run on its own too). Lyricist is a well-designed word-processing
tool for lyric writers.
One
of TrackNotes main features is its reporting functionality.
Most everything can be printed out in report form. After a
session, you can send clients home with the recording and
printed track sheets that include all the notes.
TrackNotes
has become the standard for session documentation. It is a
great tool for collaboration and compilation projects and
is perfect for pre-session production planning. TrackNotes
enables engineers to understand and review their own and others
production techniques.
Purchase
Now for $5.00 off the Suggested Price